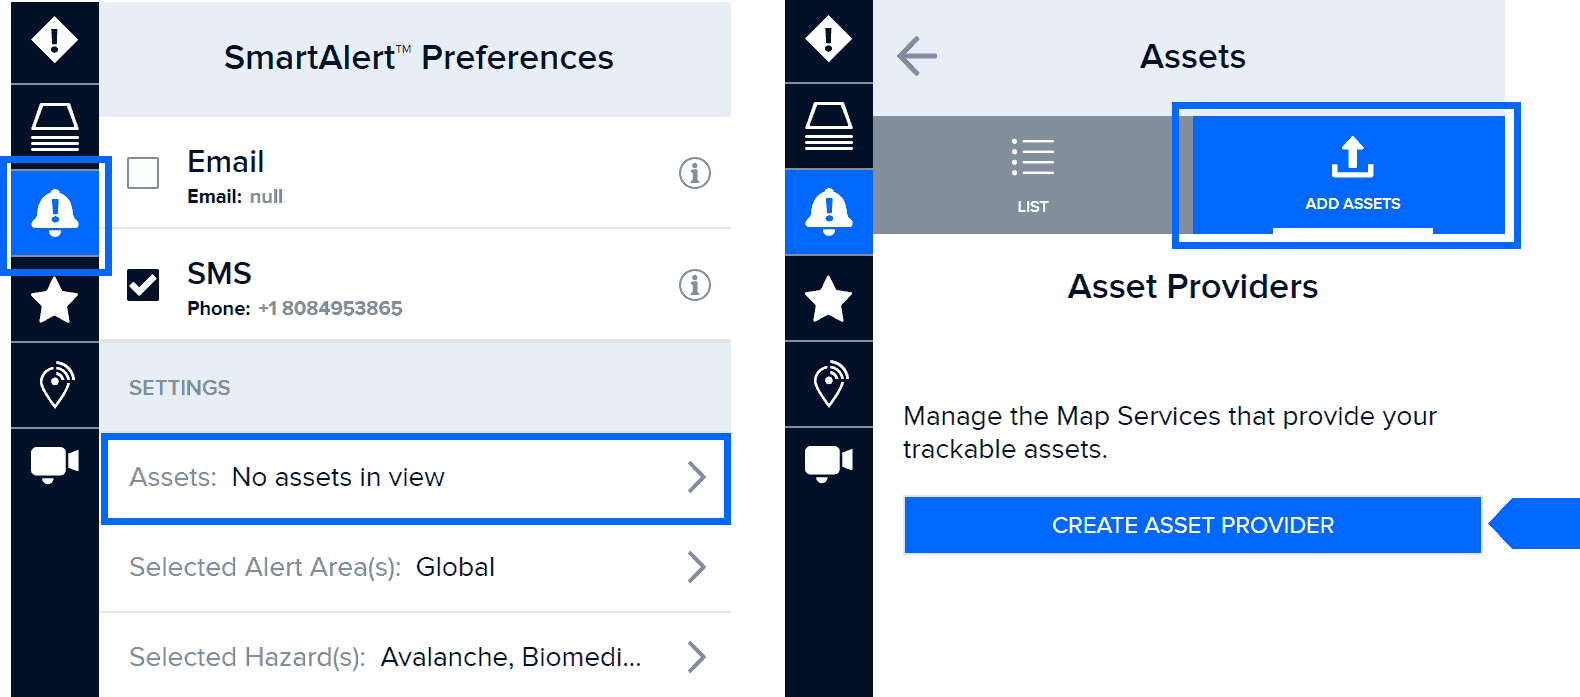

To setup asset protection, click the SmartAlert icon on the left toolbar and then click the Assets link.
Once the Assets panel opens, click the Add Assets tab.
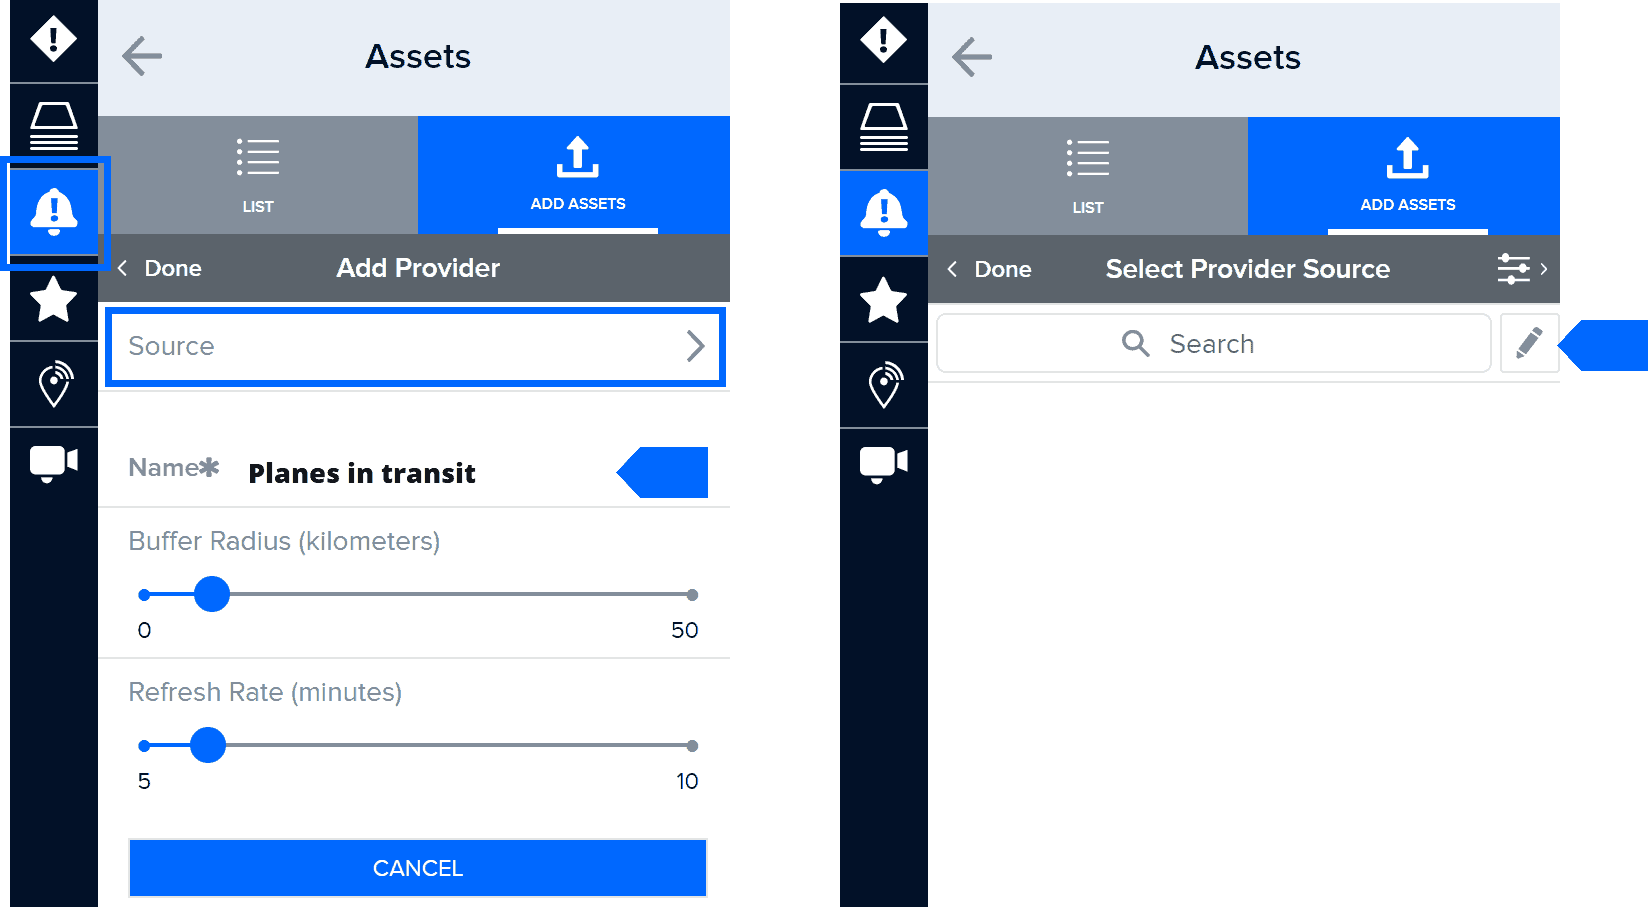
Enter a meaningful name for the asset data layer you want to import and click the Source link. Next, click the Edit icon to begin the process of adding an asset layer to the system.
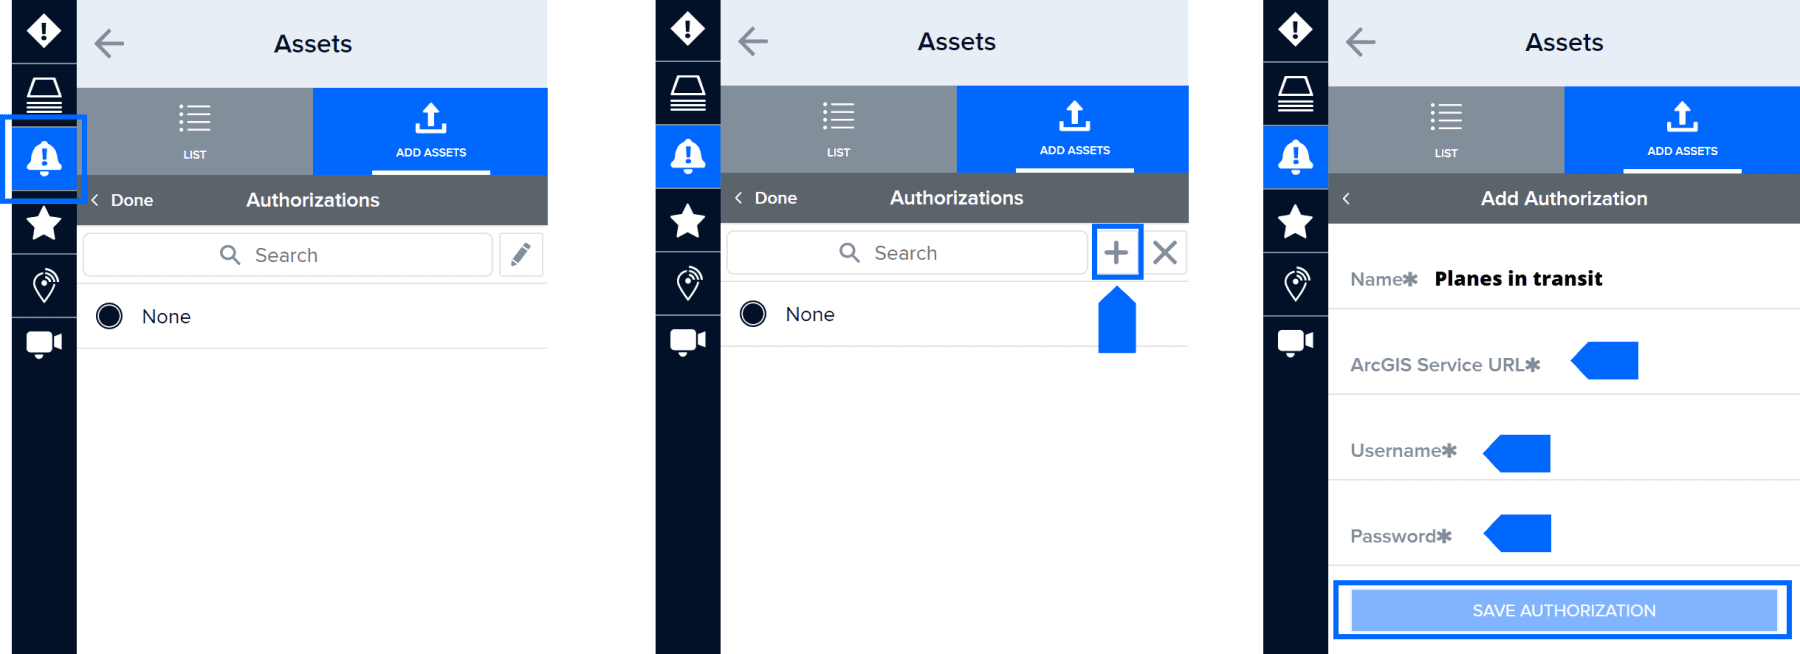

Now click the Plus (+) symbol and add a web service URL for the assets layer you wish to import. If required, you can also add credentials needed to access the service by clicking the Authorization link.
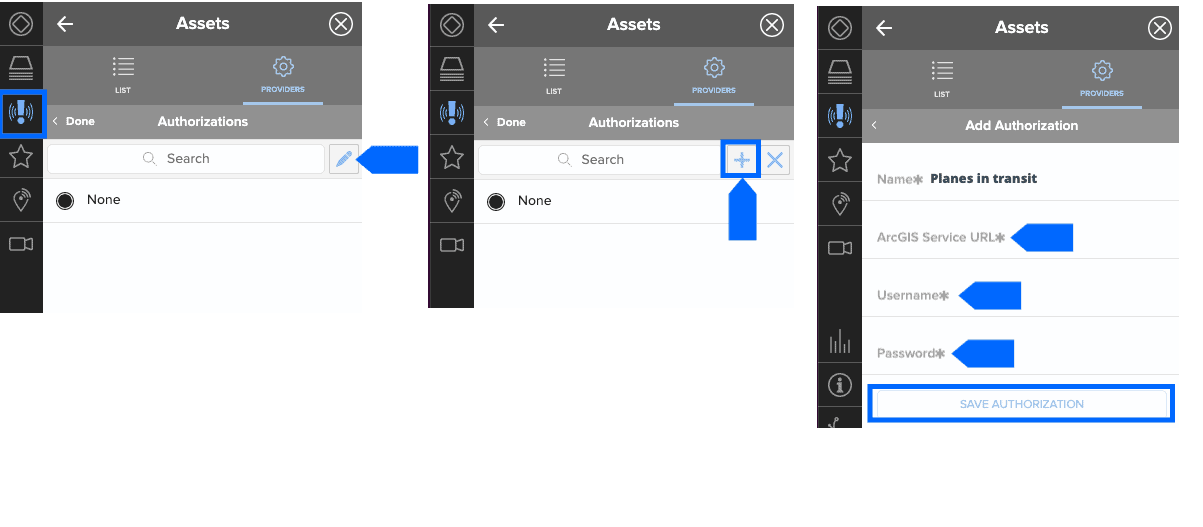
To add authorization credentials, click the Edit icon, then the Plus (+) symbol, and then enter the layer authorization details shown below. Authorizations will remain in the list for future use, should you wish to import other asset sources that utilize the same authorization. You can remove authorizations at any time.
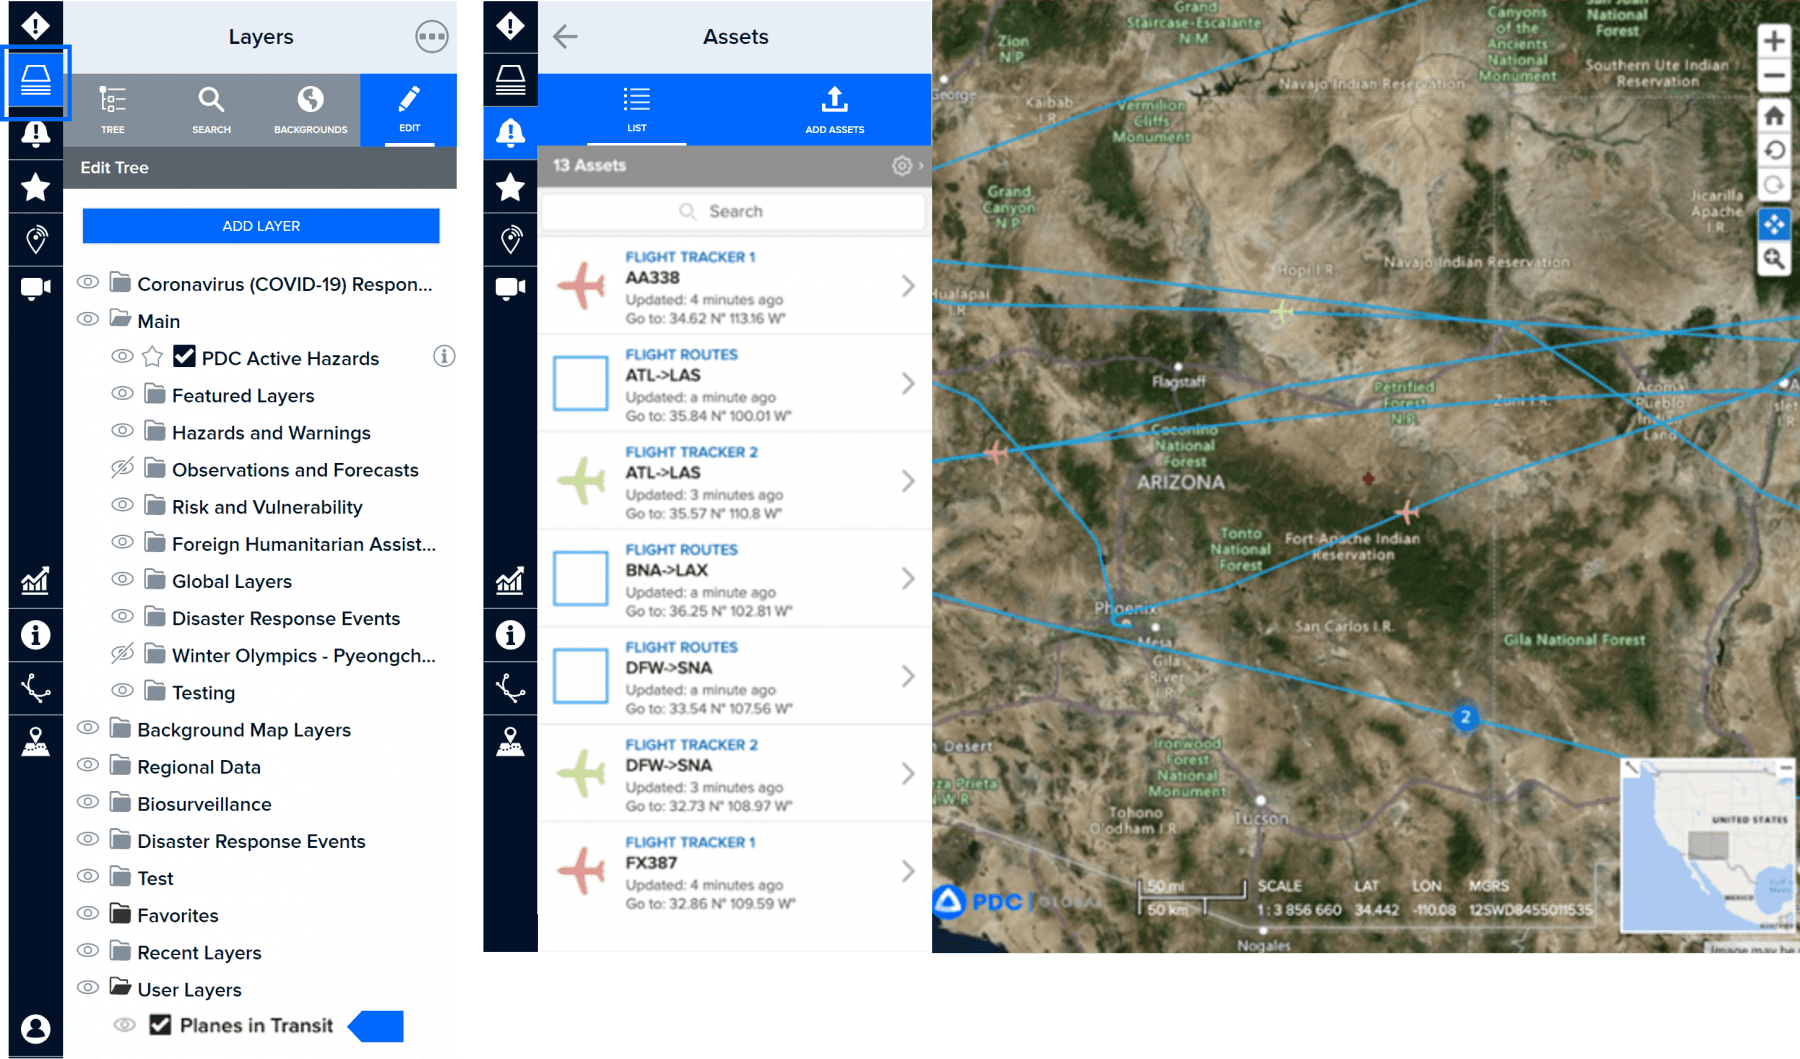

Click the Layers icon in the left toolbar to view your list of layers.

The asset layer(s) you’ve added will appear under the User Layers folder along with any other data layers you’ve previously imported.
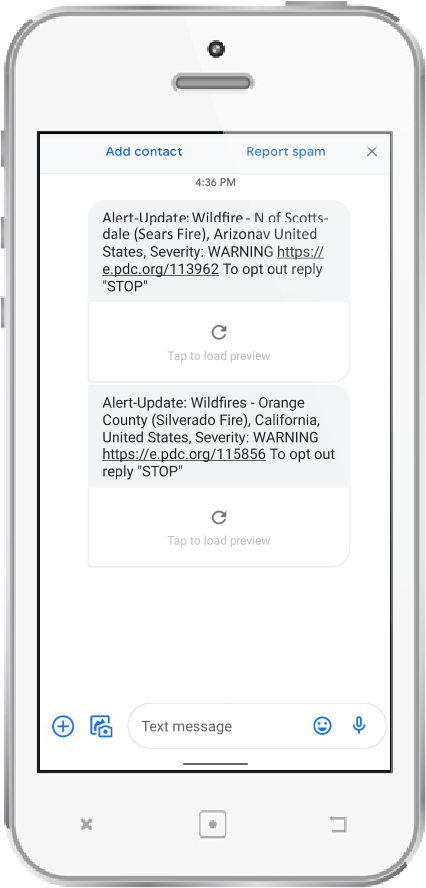
Find out when assets are in harm's way.


